Getting started with IIS
Internet Information Services (IIS)
Internet Information Services (IIS) for Windows is a flexible, secure and manageable Web server for hosting anything on the Web. From media streaming to web applications, IIS’s scalable and open architecture is ready to handle the most demanding tasks.
IIS is a versatile web server platform used to host websites, web applications, APIs, and web services.
Nginx and Apache are a few other examples of web servers capable of hosting websites. While both can be used for various web applications, IIS (Internet Information Services) is particularly well-suited for Windows environments and offers strong integration and support for .NET applications.
How to enable and setup IIS on a Windows 11 system
Method 1: From Control panel
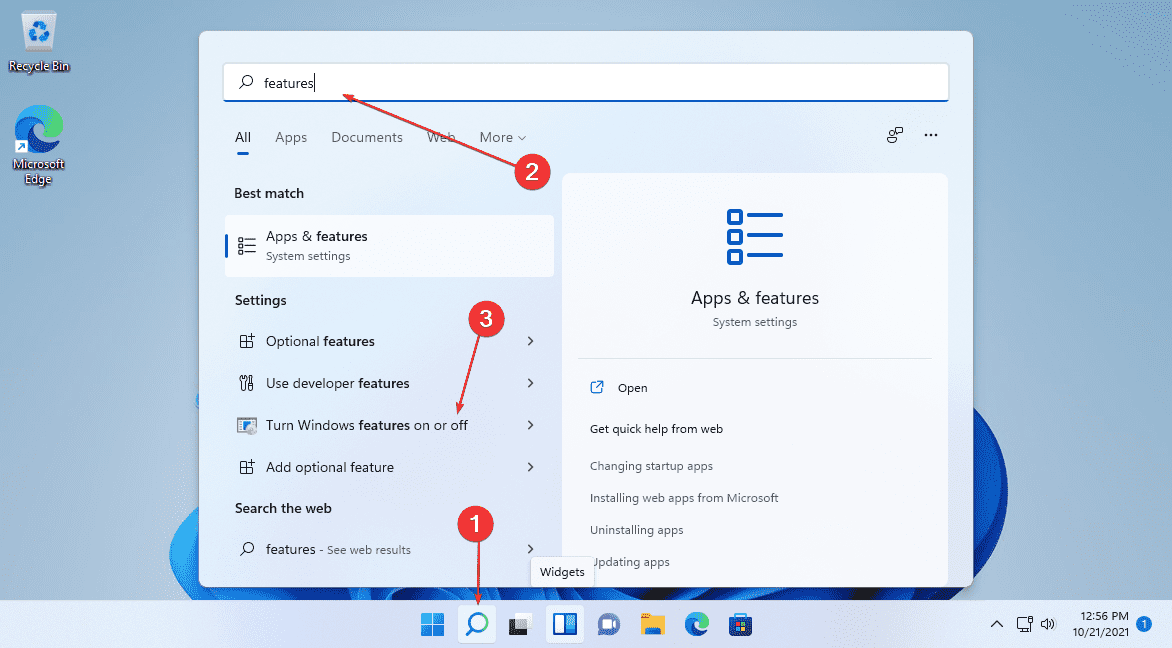
1. Open Windows 11 Features
- Click on the Search icon given on the Windows 11 Taskbar. There, type- features, then select the option “Turn Windows features on or off“. This will open a window from where we can enable various in-built options of the operating system including the IIS.
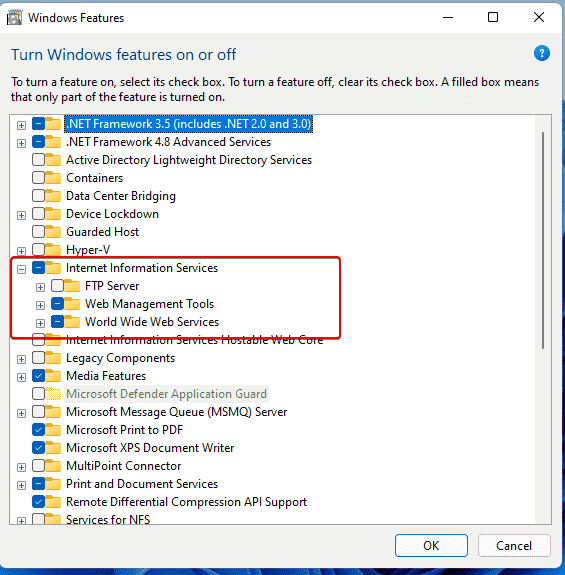
2. Enable Internet Information Services
- Now, from the list of the options, click the box given for “Internet Information Services, Web Management Tools and World Wide Web Services” to select them. This will not only install IIS but also the Managements tool- IIS Management Console including Application features, Common HTTP Features, Health Diagnosis, Performance, and Security Features.
- After selecting them, click on the OK button. Wait for a few seconds this will install the features and then ask you to restart your PC. Do that to completely integrate the webserver in your Windows 11.
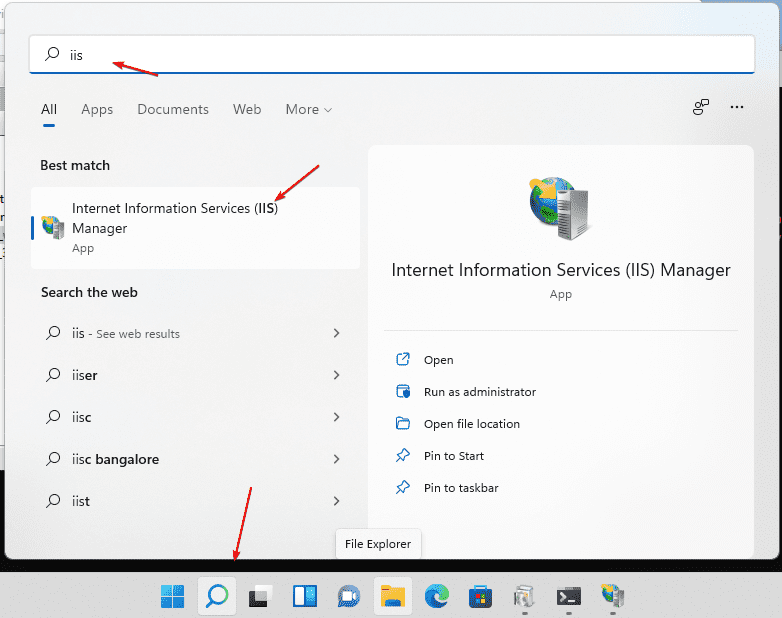
3. Run IIS Manager on Windows 11
-
Once the installation is completed and the system has been restarted, go to your Windows 11 search box and type- IIS, then select “Internet Information Services (IIS)” to run your Web server manager.
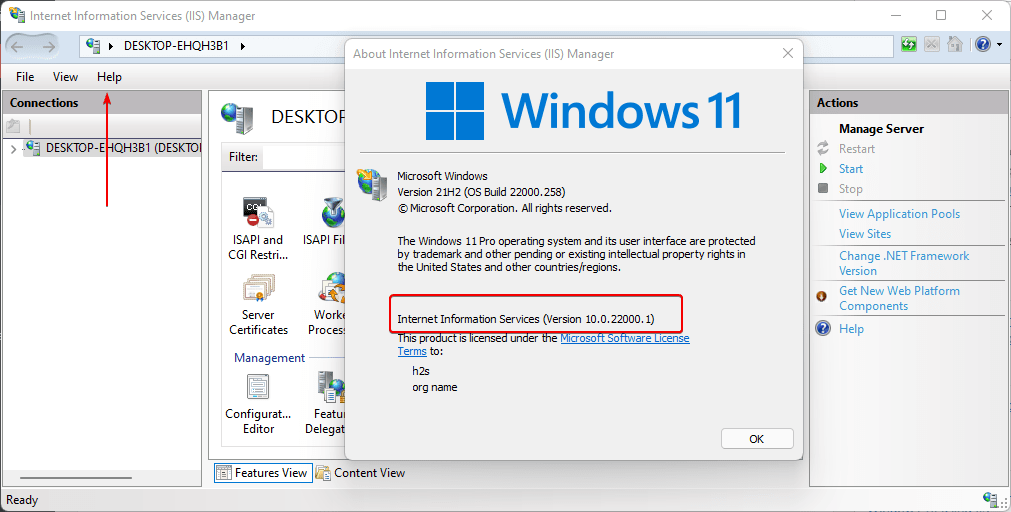
4. Check IIS Manager version
- To know which version of the Microsoft web server exactly you are using. On the IIS Manager, click on the File option in the menu and select “About Internet Information Service“.
- Disable (optional): After some time if you don’t require IIS anymore on your Windows 11 system then to disable the same, again open “Turn windows feature ON or OFF” and uncheck the options you have selected to enable it in “Step 2” of this article.
Method 2: From Terminal
1. Install IIS on Windows 11 using Powershell command
-
Well, many users are either remotely using Windows or Microsoft servers without a GUI interface. Or generally, those who don’t want to go through various GUI steps to enable IIS can use the command line.
- Right-click on the Windows 11 Start button.
- Select Windows Terminal (Admin)
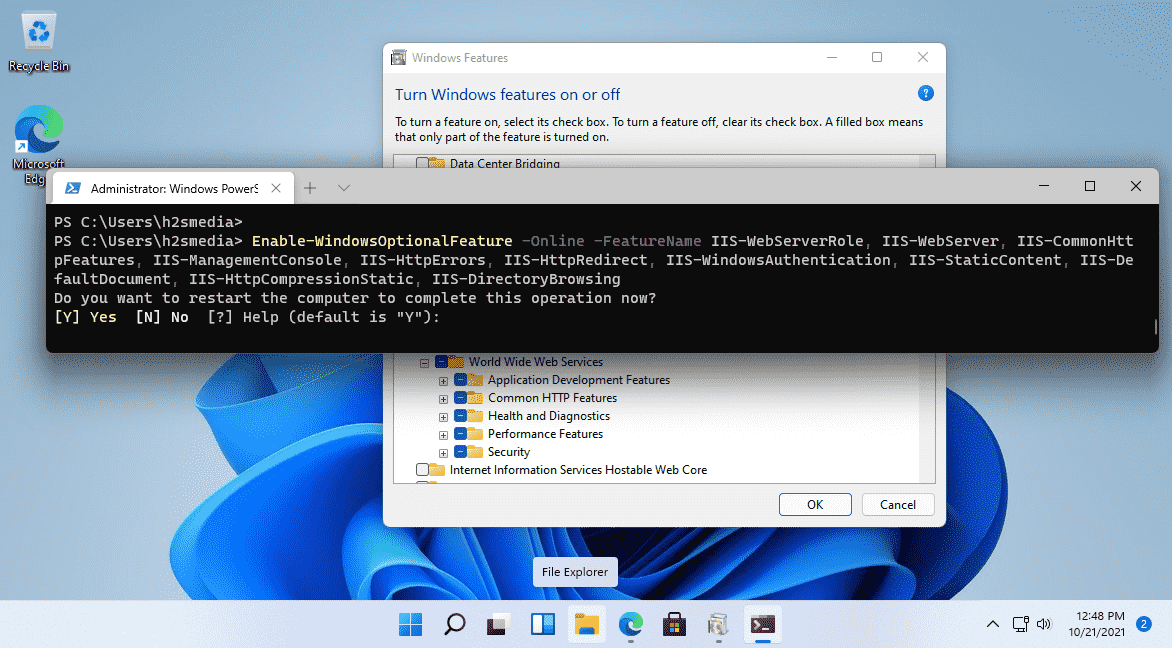
- Paste the below-given command and hit the Enter key:
1
Enable-WindowsOptionalFeature -Online -FeatureName IIS-WebServerRole, IIS-WebServer, IIS-CommonHttpFeatures, IIS-ManagementConsole, IIS-HttpErrors, IIS-HttpRedirect, IIS-WindowsAuthentication, IIS-StaticContent, IIS-DefaultDocument, IIS-HttpCompressionStatic, IIS-DirectoryBrowsing
After that press the Y key to restart and properly integrate the Internet Information system on Windows 11.
Command to Disable When you don’t require the IIS anymore, the same can be disabled using the command line, paste the given command in Windows Terminal, and hit the Enter key to proceed.
1
2
Disable-WindowsOptionalFeature -Online -FeatureName IIS-WebServerRole, IIS-WebServer